Getting Started with the FRWY-LS1012A
本文档内容
-
Get Started
-
Plug it in
-
Get Software
1. Get Started
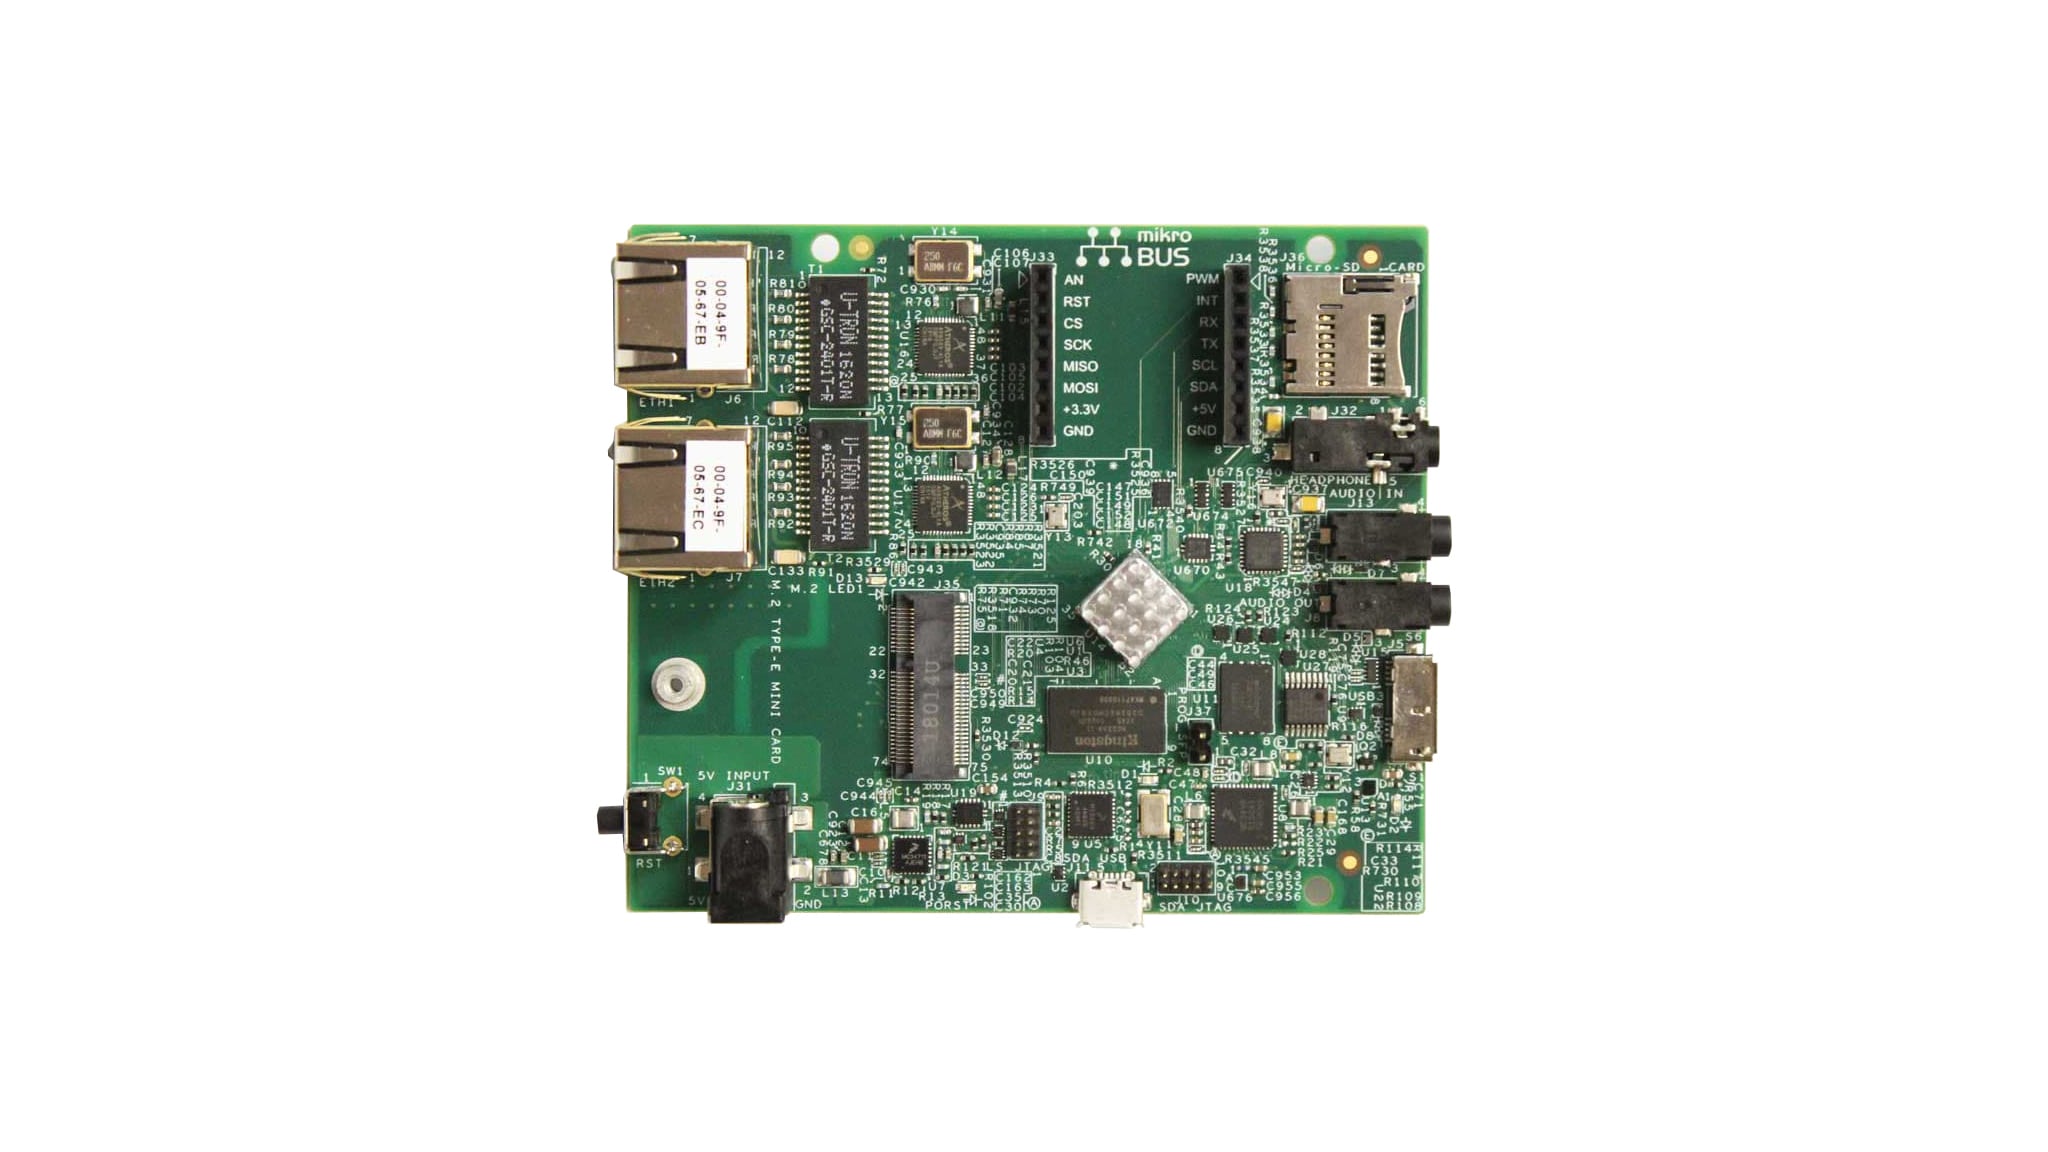
1.1 Get Started with the Layerscape FRWY-LS1012A board
This video provides an overview of the FRWY-LS1012A. For details about the features of the board, refer to Layerscape LS1012A Freeway Board Reference Manual .
2. Plug it in
2.1 Connect the Power Supply
Connect the 5 V DC power adapter to the power jack J31 and turn on the power supply. The board will turn on. Then, the red PORST LED (D3) will turn on and turn off immediately, and the green SDA
LED (D1) will turn on.
2.2 Stop the Storage Service of Windows
If you are using a Windows 10 machine as the host computer, stop the storage service as follows:
- Select Start → Services
- In the Services console, right-click Storage Service and select Stop
If the storage service is not stopped before plugging in the USB cable, the red PORST LED (D3) turns on and the board cannot be booted. In this case, you need to stop the storage service and
power off and power on the board again for the serial connection to work.
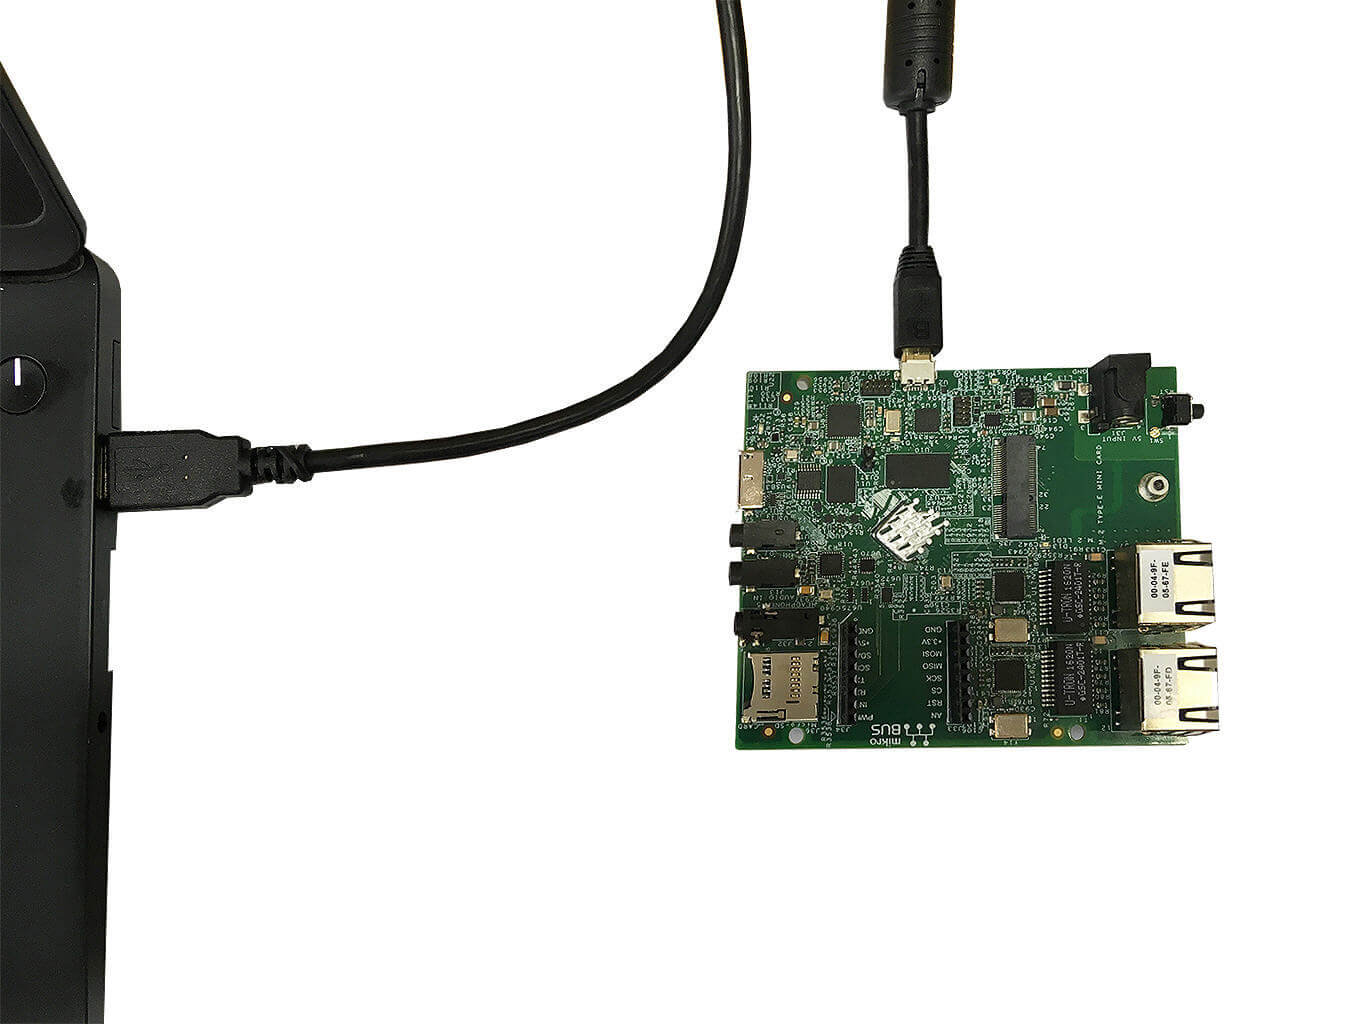
2.3 Attach the USB cable
Plug the type-A connector of the USB cable into the USB port of your Windows PC and connect the Micro-B connector to the onboard USB 2.0 AB (Debug) connector J11.
2.4 Install the mbed Windows Serial Port Driver
Make sure that the mbed driver for the board serial port is installed. Before you run the driver installer, you must have the board plugged in your PC.
2.5 Setup the Serial Port Driver
With the serial port driver installed, run your favorite terminal application to control and monitor the FRWY-LS1012A from the serial console. Configure the terminal to 115,200 baud rate, 8 data bits, no parity, and 1 stop bit.
To determine the port number of the FRWY-LS1012A virtual COM port, open the device manager and look under the "Ports" group.
Not sure how to use a terminal application? Try one of these tutorials: Tera Term Tutorial, PuTTY Tutorial.
2.6 Boot the Board
Press the Reset switch (SW1) and the board will boot up. The red PORST LED D3 will turn on momentarily and switch off.
3. Get Software
3.1 Jump Start Your Design with the LS1012A LSDK
Layerscape SDK is the next generation of Linux enablement software for Layerscape and QorIQ family of processors. It provides all the necessary drivers, tools and libraries required to enable all features of the Arm®-based Layerscape processors and Power-based QorIQ P-series and T-series processors.
The Flexbuild source tarball and LSDK components, such as pre-built images are available at Layerscape LDP.
- Layerscape Software Development Kit - Flexbuild source tarball
- Layerscape SDK Components - LSDK components
3.2 Deploying Ubuntu UserLAnd on the FRWY-LS1012A
The FRWY-LS1012A Getting Started Guide provides easy, step-by-step instructions on how to deploy Ubuntu UserLAnd on the FRWY-LS1012A. Click below to download the FRWY-LS1012A Getting Started Guide.
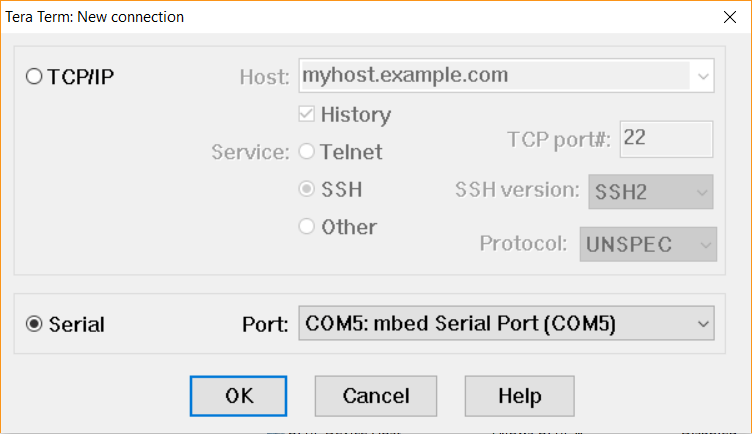
Tera Term Tutorial
Tera Term Tutorial
Tera Term is a very popular open source terminal emulation application. This program can be used to display information sent from your NXP development platform's virtual serial port.
- Download Tera Term from SourceForge. After the download, run the installer and then return to this webpage to continue
- Launch Tera Term. The first time it launches, it will show you the following dialog. Select the Serial option. Assuming your board is plugged in, there should be a COM port automatically populated in the list
- Configure the serial port settings (using the COM port number identified earlier) to 115,200 baud rate, 8 data bits, no parity and 1 stop bit. To do this, go to Setup → Serial Port and change the settings
- Verify that the connection is open. If connected, Tera Term will show something like below in its title bar
- You're ready to go

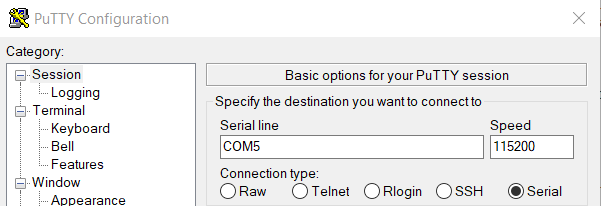
PuTTY Tutorial
PuTTY Tutorial
PuTTY is a popular terminal emulation application. This program can be used to display information sent from your NXP development platform's virtual serial port.
- Download PuTTY using the button below. After the download, run the installer and then return to this webpage to continue
- Launch PuTTY by either double clicking on the *.exe file you downloaded or from the Start menu, depending on the type of download you selected
- Configure in the window that launches, select the Serial radio button and enter the COM port number that you determined earlier. Also, enter the baud rate, in this case 115,200
- Click Open to open the serial connection. Assuming the board is connected, and you entered the correct COM port, the terminal window will open. If the configuration is not correct, PuTTY will alert you
- You're ready to go
Design Resources
Board Documents
Chip Documents
Support
Forums
Connect with other engineers and get expert advice on designing with the FRWY-LS1012A on one of our community sites: