Getting Started with the FRDM-K64F
本文档内容
-
连接
-
获取软件
-
构建、运行
1. 连接
1.1 Important Information Before Plugging In Your FRDM-K64F
板信息
OpenSDA is a serial and debug adapter circuit that runs on a Kinetis K20 device built into many NXP development boards.
It allows users to download and debug programs onto the target K64F chip using only a USB cable.
Some FRDM-K64F boards may contain older OpenSDA firmware that is incompatible with Windows 10 due to changes made in how Windows handles Mass Storage Devices. This can potentially corrupt older versions of the OpenSDA firmware found on those FRDM-K64F boards.
The vast majority of FRDM-K64F boards currently being shipped from distributors will already have updated firmware that is not affected, but some older inventory may still contain the outdated firmware.
To ensure proper operation of the FRDM-K64F with Windows 10, disable Storage Services on your Windows 10 computer before plugging it in the first time and update the OpenSDA firmware if needed:
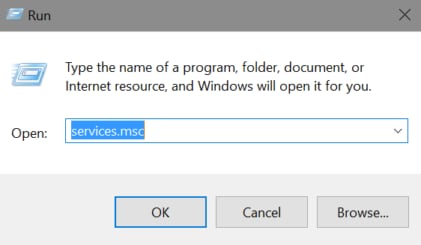
- Hold down the Windows logo key on your keyboard and press R to bring up the Windows Run prompt
- Type in services.msc and hold down Ctrl+Alt and hit Enter to launch the Services application in Administrator mode
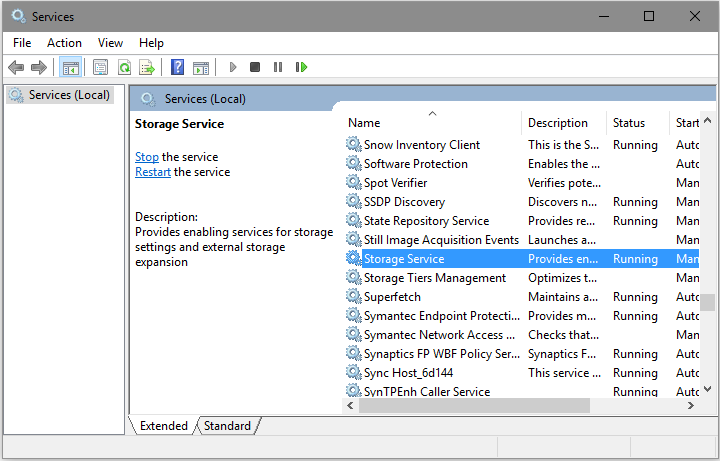
- Once open, find the "Storage Services" item and double click on it to open it
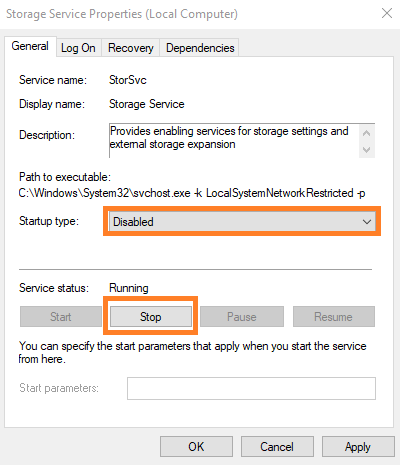
- In the properties box that comes up, change the Startup type to “Disabled” and then click on "Stop". If both options are grayed out, make sure you started the Services program in Administrator mode
- Now take the FRDM-K64F board and hold down the reset button as you plug the board into your computer
- If the board enumerates as a drive named "MAINTENANCE" then your board has the latest firmware and no further action is needed. Skip to the last step (#10) to re-enable Storage Services
- If the board enumerates as a drive named something else, drag and drop this 0244_k20dx_bl_0x5000.bin file to that drive file to that drive. This will update the OpenSDA bootloader
- The board should now automatically re-enumerate as a drive named MAINTENANCE. Drag and drop this k20dx_frdmk64f_if_crc_legacy_0x5000.bin file to that MAINTENANCE drive to update the OpenSDA CMSIS-DAP application
- The board should automatically re-enumerate again and come up as a drive named FRDM-K64FD. The OpenSDA bootloader and OpenSDA application are now both up to date and will work correctly with Windows 10
- Re-enable the Storage Services by using the same steps as before to open up the Storage Services dialog box, change the startup type back to "Automatic (Delayed Start)" and click on "Start"
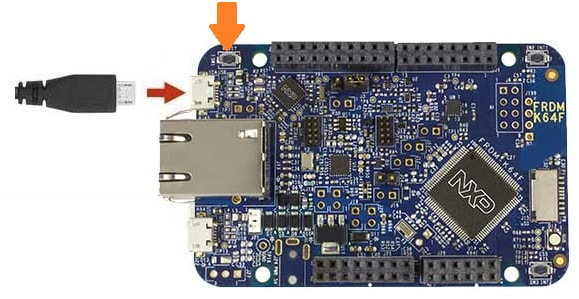
If you do not see any drive enumerate at all when plugging in the board in Step #6, the OpenSDA firmware may have been corrupted by Windows. The only way to fix this is to reprogram the K20 chip that the OpenSDA firmware runs on using an external debug tool. Instructions for this process can be found in this OpenSDA Community post.
1.2 FRDM-K64F开发平台快速入门
现在可以试用FRDM-K64F!您可以选择观看短片中的操作顺序或遵循下面列出的详细操作。
 Diagnostic Test Release 201909XX
 CPU: NXP S32G
 Board: S32G274A Board

 MC_CGM_0 Clock Mux 0 -> XBAR_CLK (Core Clock)
 CORE_DFS_1 Clock -> MC_CGM_0 Clock Mux 0
 CORE_VCO Clock -> CORE_DFS_1 Clock
 FXOSC -> CORE_VCO Clock
 FXOSC: 40000000Hz
 CORE_VCO Clock: 2000000000Hz
 CORE_DFS Clock: 1000000000Hz
 XBAR_CLK: 500000000Hz
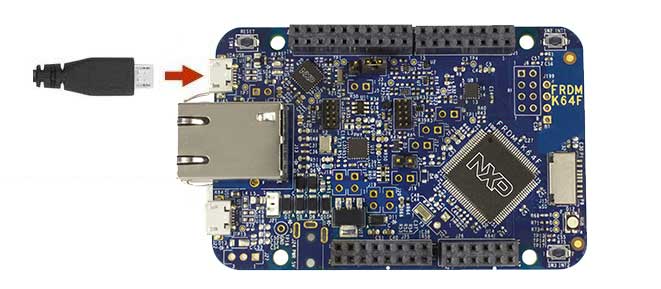
1.3 连接USB线缆
 Diagnostic Test Release 201909XX
 CPU: NXP S32G
 Board: S32G274A Board

 MC_CGM_0 Clock Mux 0 -> XBAR_CLK (Core Clock)
 CORE_DFS_1 Clock -> MC_CGM_0 Clock Mux 0
 CORE_VCO Clock -> CORE_DFS_1 Clock
 FXOSC -> CORE_VCO Clock
 FXOSC: 40000000Hz
 CORE_VCO Clock: 2000000000Hz
 CORE_DFS Clock: 1000000000Hz
 XBAR_CLK: 500000000Hz
1.4 运行开箱即用的演示
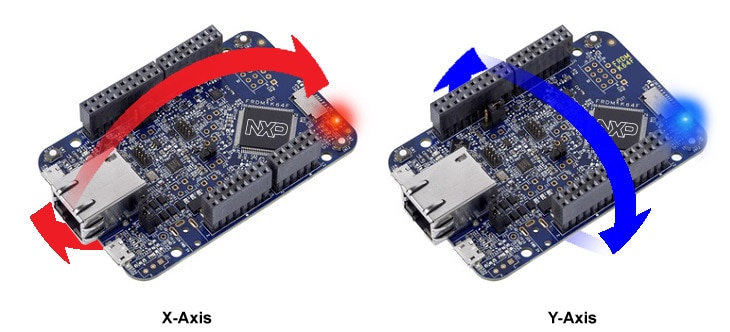
FRDM-K64F预装了”气泡水平仪“演示,可充分利用板载加速度传感器。When the board is flat, the RGB LED is turned off and when the board is tilted, the red or blue LEDs gradually illuminate based on the degree of tilt on the X- and Y-axis.
2. 获取软件
选择开发路径
Kinetis软件开发套件(SDK)+集成开发环境(IDE)
- 通过SWD和JTAG支持调试
- 软件灵活性高
- 全套外设驱动器,含源代码
- 应用示例和项目文件
Zephyr™ 操作系统
- 可扩展的开源实时操作系统(RTOS)
- 支持多种硬件架构
- 针对资源受限设备进行了优化
- 本着安全为先的原则
Arm Mbed Online Development Site
- 在线编译器,无SWD或JTAG调试
- 简单但高度抽象的编程接口
- 有用但受限的驱动程序,带源代码
- 技术论坛提交的示例
2.1 安装软件
2.2 采用MCUXpresso SDK,快速开始设计
点击以下链接,下载FRDM-K64F的预配置SDK版本。Learn about SDK.
MCUXpresso SDK为免费附赠,包含所有硬件抽象和外设驱动软件的完整源代码,根据宽松的开源许可提供。

3. 构建、运行
在 FRDM-K64F 上构建并运行 SDK 演示
3.1 浏览MCUXpresso SDK示例代码
MCUXpresso SDK附带一系列示例应用代码。To see what's available, browse to the SDK boards folder of your SDK installation and select your board, the FRDM-K64F
如需了解特定示例代码的详细信息,请参阅示例目录中的readme.txt文件。
3.2 构建、运行并调试MCUXpresso SDK示例
如果您对其中的一个或几个演示应用或驱动程序示例感兴趣,也许想了解如何自己完成构建和调试。MCUXpresso SDK快速入门指南按步骤介绍了如何轻松地为SDK支持的所有工具链配置、构建和调试演示。
采用以下指南,了解如何使用MCUXpresso IDE打开、构建和调试示例应用。
使用MCUXpresso IDE
导入MCUXpresso SDK
- 打开MCUXpresso IDE
- 切换到MCUXpresso IDE窗口中的“已安装SDK”视图
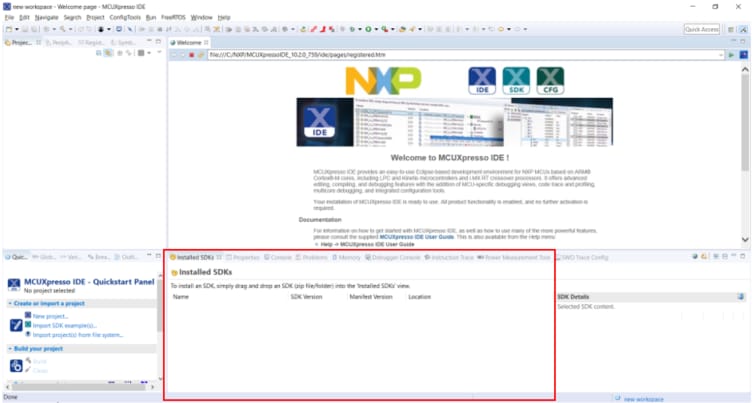
- Open Windows Explorer and drag and drop the FRDM-K64F SDK (unzipped) file into the Installed SDKs view
- 您将看到以下弹出窗口。点击OK(确定)继续导入:

- 已安装的SDK将显示在“已安装SDK”视图中,如下所示:

构建示例应用
The following steps will guide you through opening the hello_world example.
-
在左下角找到快速启动面板
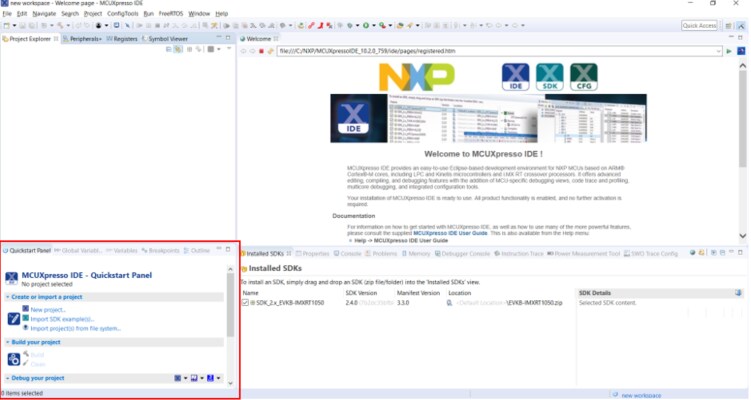
-
然后点击“导入SDK示例……”
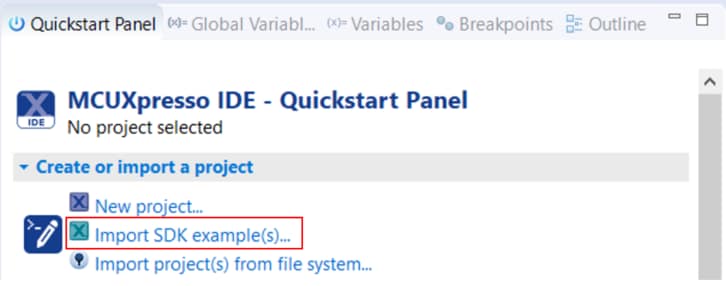
-
Click on the frdmk64f board to select that you want to import an example that can run on that board and then click on Next
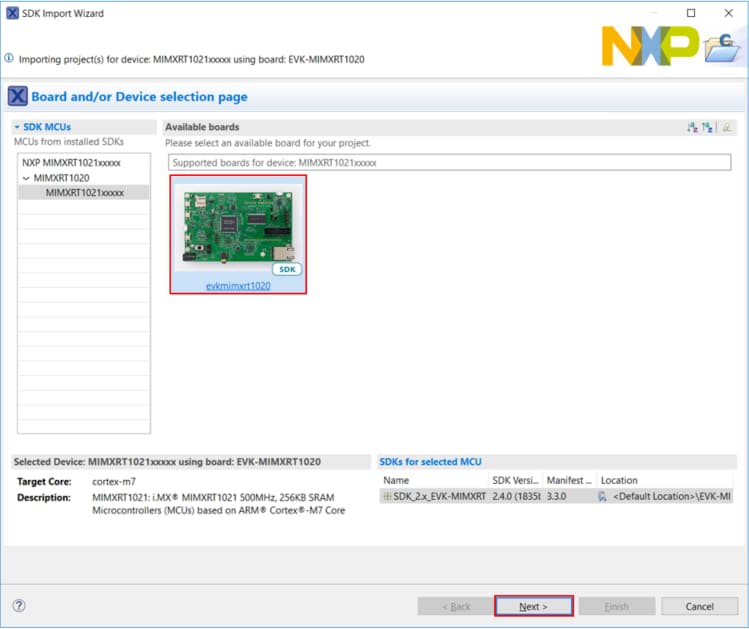
-
Use the arrow button to expand the demo_apps category and then click the checkbox next to
hello_worldto select that project. 要使用UART进行打印(而不是默认的半主机),请清除项目选项下的“启用半主机”复选框。Then, click on Next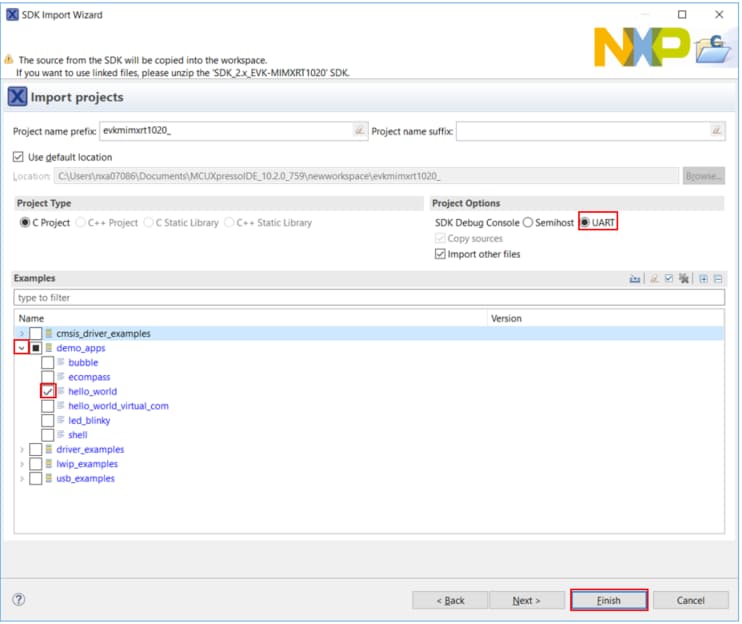
-
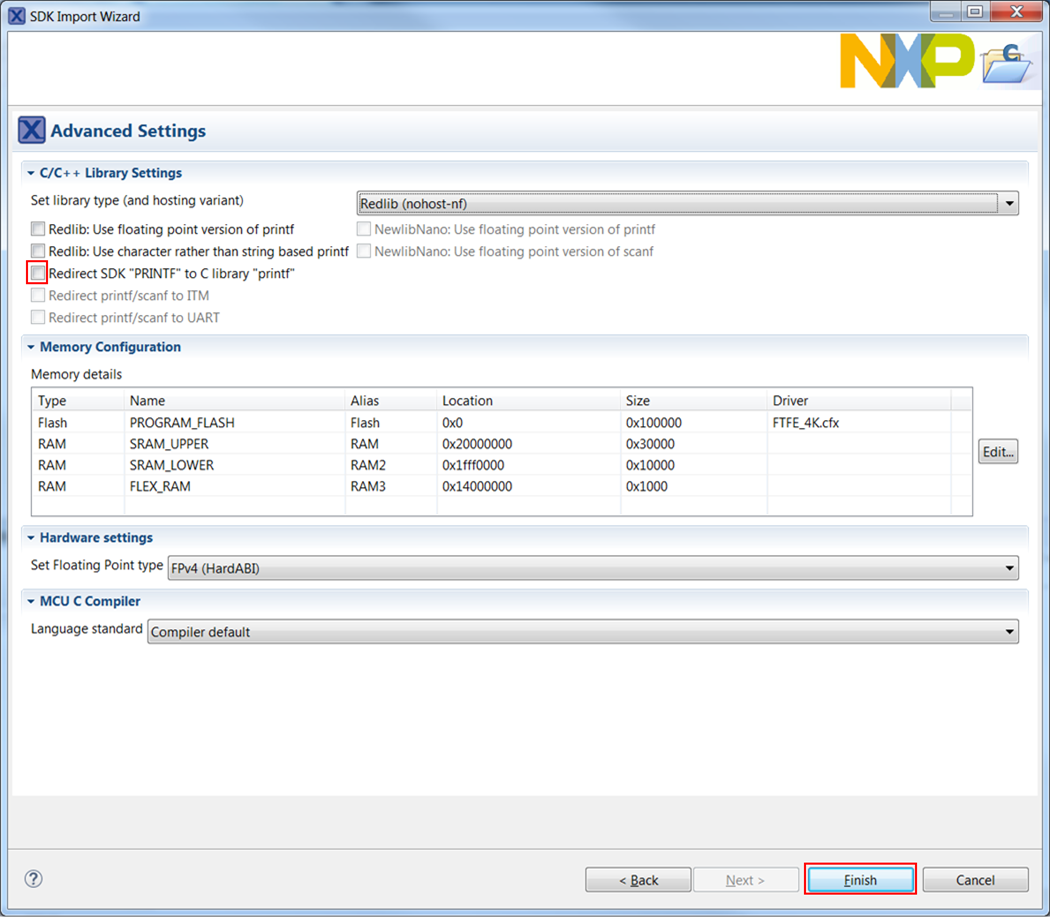
在“高级设置”向导中,清除“将SDK “PRINTF”重定向到C语言库“printf”“复选框,以便使用MCUXpresso SDK控制台功能进行打印,而不是通用的C库文件。然后点击“完成”。
-
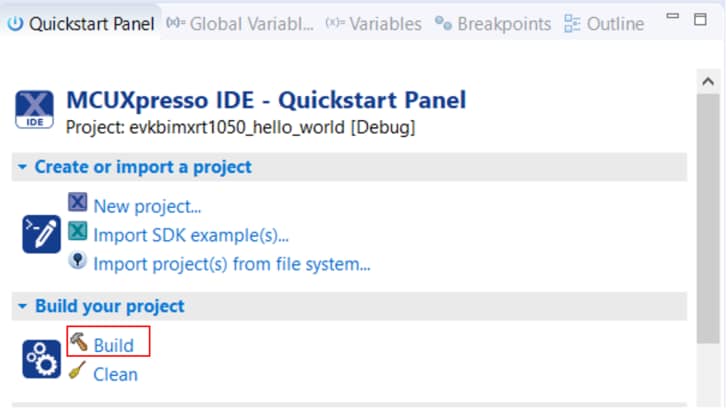
现在点击项目名称来构建项目,然后点击Build图标
-
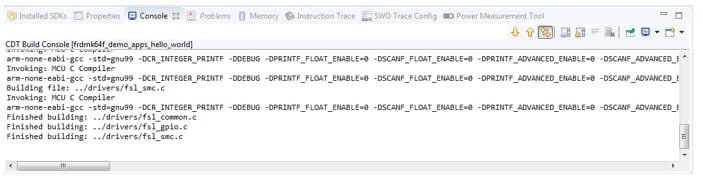
您可以在“控制台”选项卡中查看构建的状态
运行示例应用
- 项目已经编译好了,现在您可以将其闪存到板上并运行它
- Make sure that the FRDM-K64F board is plugged in and click on Debug '
frdmk64f_demo_apps_hello_world' [Debug]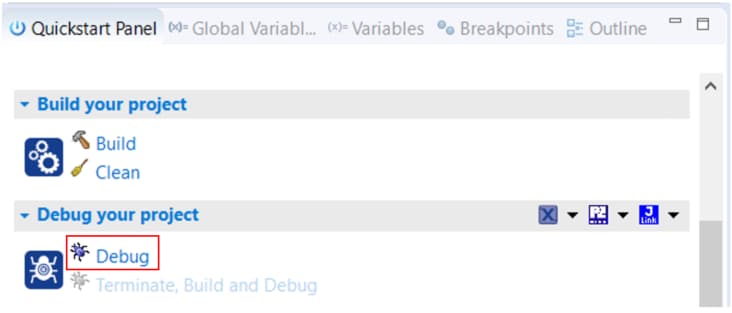
-
MCUXpresso IDE 将探测互联的电路板,并应查找 MBED CMSIS-DAP 硬件调试器,此硬件调试器是 FRDM-K64F 上集成 OpenSDA 电路的一部分。Click on OK to continue
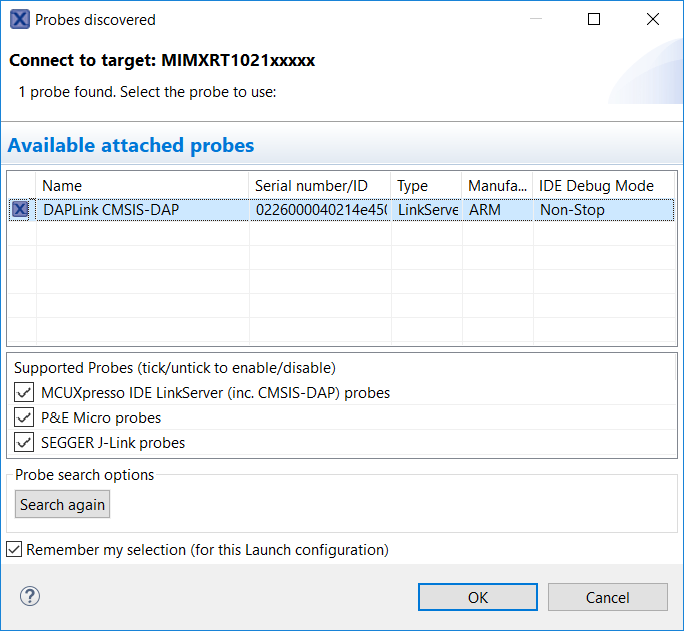
-
固件将被下载到板,并且调试器开始运行。
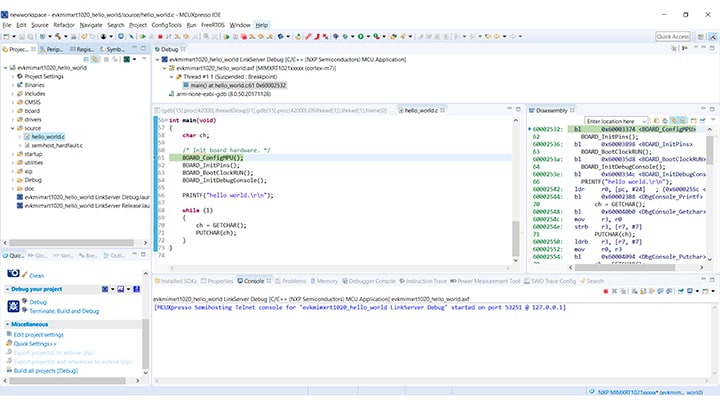
-
打开一个终端程序,并连接到已计入的电路板上的COM端口。Use 115,200 baud 8 data bits, no parity and 1 stop bit
-
点击"Resume"按钮启动应用:
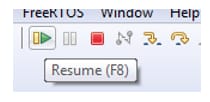
-
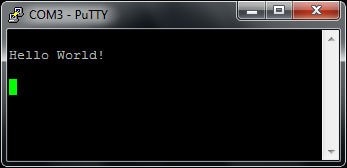
hello_world应用开始运行,标语显示在终端上。If this is not the case, check your terminal settings and connections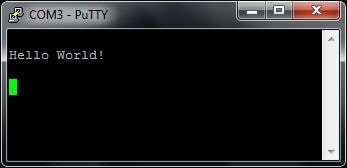
-
使用菜单栏的控件暂停、进入和逐步执行指令,然后点击Terminate图标停止调试会话:
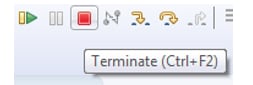
想使用其他工具链?
Running a Demo Using IAR
构建示例应用
The following steps will guide you through opening the hello_world application. 对于其他示例应用,这些步骤可能会略有不同,因为某些应用的路径可能会有额外的文件夹层级。
-
如果还未完成,在以下路径中打开所需应用的示例应用工作区:大多数示例应用演示工作区文件位于以下路径:
/boards/ / / /iar Using the
hello_worlddemo as an example, the path is:/boards/frdmk64f/demo_apps/hello_world/iar -
从下拉列表中选择所需的构建目标。在这个例子中,选择“hello_world - Debug”目标
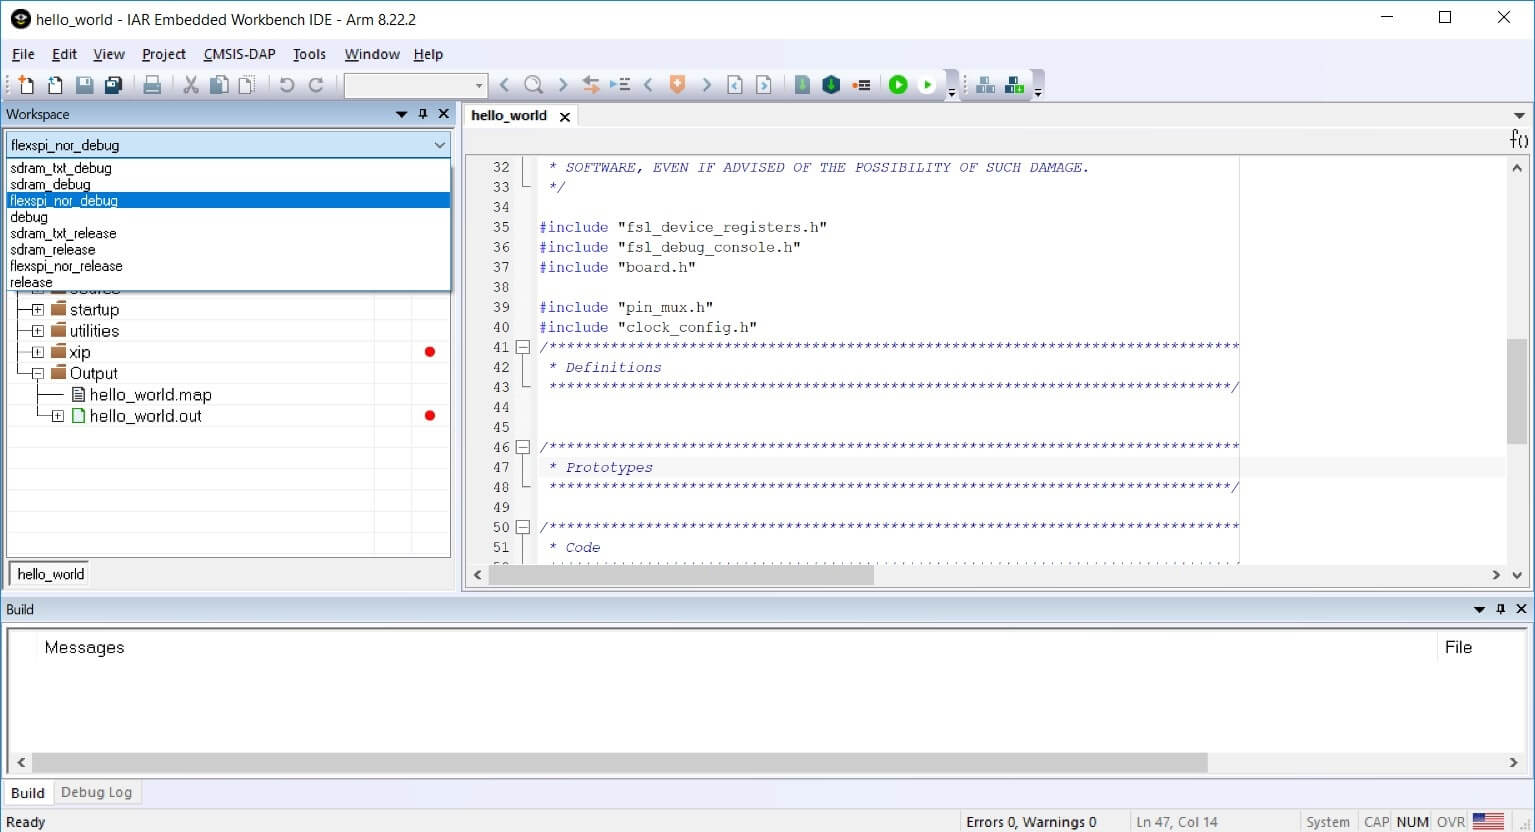
-
要构建应用,点击"Make"按钮(下文中用红色突出显示)。
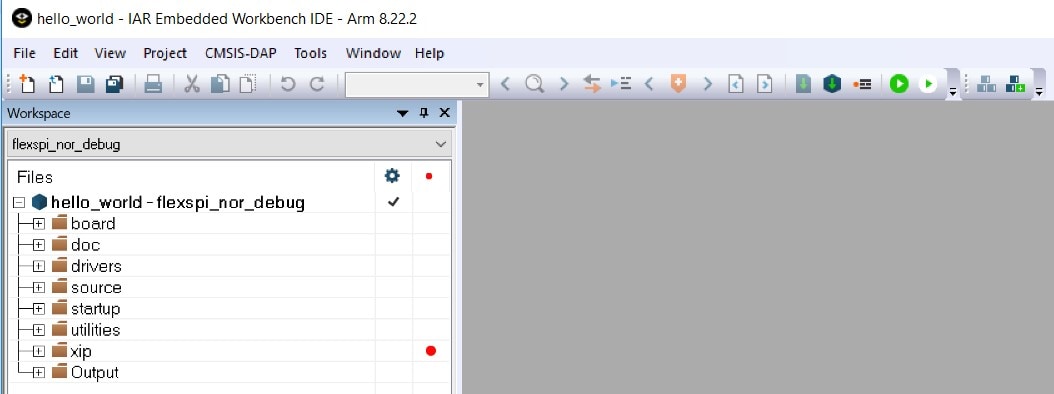
-
The build will complete without errors:
运行示例应用
FRDM-K64F板出厂时预装了mbed/CMSIS-DAP调试接口。If you have changed the debug OpenSDA application on your board, visit Open SDA for information on updating or restoring your board to the factory state.
-
Connect the development platform to your PC via USB cable between the "SDAUSB" USB port on the board and the PC USB connector
- 打开PC上的终端应用(如PuTTY或TeraTerm),并连接到您之前确定的调试COM端口。采用以下设置配置终端:
- 波特率为15,200
- 无奇偶校验位
- Eight data bits
- 停止位为1
-
点击"Download and Debug"(下载和调试)按钮,将应用下载到目标

-
然后,可将此应用下载到目标应用,并自动运行到main()函数。

-
点击"Go"按钮运行代码,以启动应用

hello_world应用开始运行,标语显示在终端上。如未显示,请检查您的终端设置和连接
采用Keil®MDK/µVision®运行演示
安装CMSIS设备包
安装MDK工具后,必须安装Cortex®微控制器软件接口标准(CMSIS)设备包,从调试角度来说才能完全支持该设备。这些设备包包括存储器映射信息、寄存器定义和闪存编程算法。按照这些步骤安装相应的CMSIS包。
- 打开名为µVision的MDK IDE。在IDE中,选择“Pack Installer”图标。

- 在Pack Installer(包安装程序)窗口,浏览至有Kinetis包的部分(这些包按字母顺序排列)。Kinetis包名以"Keil::Kinetis"开始,然后是MCU系列名称,例如"Keil::Kinetis_K60_DFP"。因为本示例使用FRDM-K64F平台,所以选择K60系列的设备包。点击设备包旁的"Install"(安装)按钮。此流程需要连接互联网才能完成。
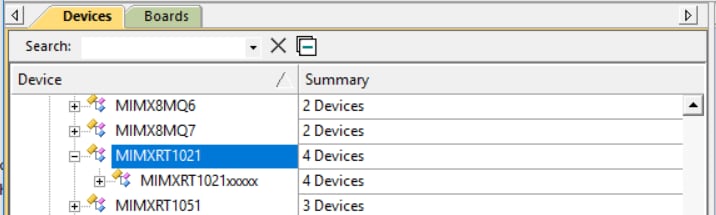
- 安装完成后,关闭Pack Installer窗口并返回到µVision IDE。
构建示例应用
The following steps will guide you through opening the hello_world application. 对于其他示例应用,这些步骤可能会略有不同,因为某些应用的路径可能会有额外的文件夹层级。
-
如果还未完成,在以下路径中打开所需的演示应用工作区:
/boards/ / / /mdk 此工作区文件名为
.uvmpw,因此在这个具体示例中,实际路径为: /boards/frdmk64f/demo_apps/hello_world/mdk/hello_world.uvmpw - 要构建演示项目,请选择"Rebuild"按钮,用红色突出显示。

- 构建将完成,并且不会报错。
运行示例应用
FRDM-K64F板出厂时预装了mbed/CMSIS-DAP调试接口。如果您已经更改了板上的调试OpenSDA应用,请访问OpenSDA了解如何更新板或将板恢复到出厂状态。
- Connect the development platform to your PC via USB cable between the "SDAUSB" USB port on the board and the PC USB connector
- 打开PC上的终端应用(如PuTTY或TeraTerm),并连接到您之前确定的调试COM端口。采用以下设置配置终端:
- 波特率为15,200
- 无奇偶校验位
- Eight data bits
- 停止位为1
- 应用构建完成后,点击"Download"按钮,将应用下载到目标。
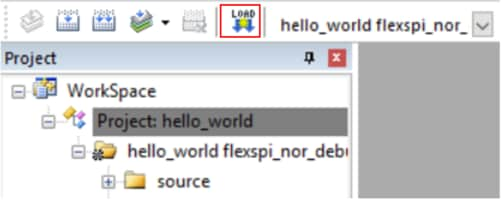
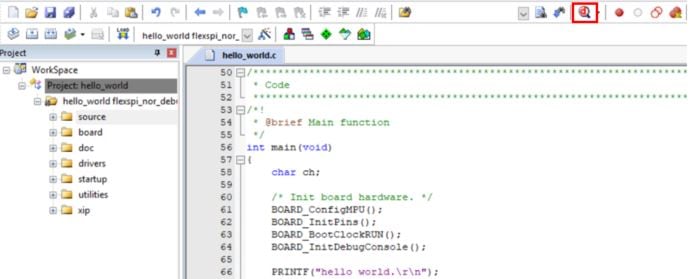
- 点击"Download"(下载)按钮后,此应用下载到目标并开始运行。To debug the application, click the "Start/Stop Debug Session" button, highlighted in red
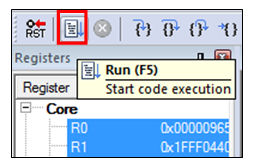
- 点击"Go"按钮运行代码,以启动应用。
hello_world应用开始运行,标语显示在终端上。如未显示,请检查您的终端设置和连接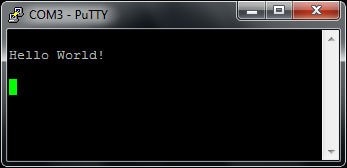
使用Arm运行演示
安装工具链
本节包含采用Kinetis SDK支持的Arm GCC工具链构建并运行KSDK演示应用所需的必要组件的安装步骤。Arm GCC工具有许多使用方式,但此例主要演示其在Windows环境中的使用。虽然这里未讨论,但GCC工具还可与Linux操作系统和Mac OSX配套使用。
安装GCC Arm嵌入式工具链
从GNU Arm Embedded Toolchain下载并运行安装程序。这是我们实际使用工具链(例如,编译器、链接器等)。GCC工具链应当对应最新的支持版本,参见Kinetis SDK版本说明。
安装MinGW
Minimalist GNU for Windows (MinGW)开发工具提供了一套不依赖第三方C-Runtime DLL (如Cygwin)的工具。KSDK所用的构建环境无需使用MinGW Build工具,但充分利用了MinGW和MSYS的基础安装。MSYS为与Unix类似的接口和工具提供基本的Shell。
- 从以下位置下载最新的MinGW mingw-get-setup安装程序:MinGW - Minimalist GNU for Windows Files
- 运行安装程序。The recommended installation path is
C:\MinGW, however, you may install to any location - Ensure that the "
mingw32-base" and "msys-base" are selected under Basic Setup
- Click "Apply Changes" in the "Installation" menu and follow the remaining instructions to complete the installation
-
添加相应项目到Windows操作系统的Path环境变量。在"Environment Variables..."部分的Control Panel → System and Security → System → Advanced System Settings下可找到它。路径为:
\bin 假设默认安装路径为
C:\MinGW,此例如下所示。如果路径设置不正确,工具链将无法正常运行。Note: If you have "
C:\MinGW\msys\x.x\bin" in your PATH variable (as required by KSDK 1.0.0), remove it to ensure that the new GCC build system works correctly.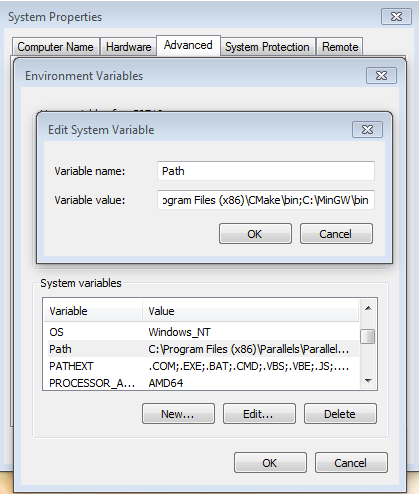
-
从以下位置下载CMake 3.0.x:CMake
-
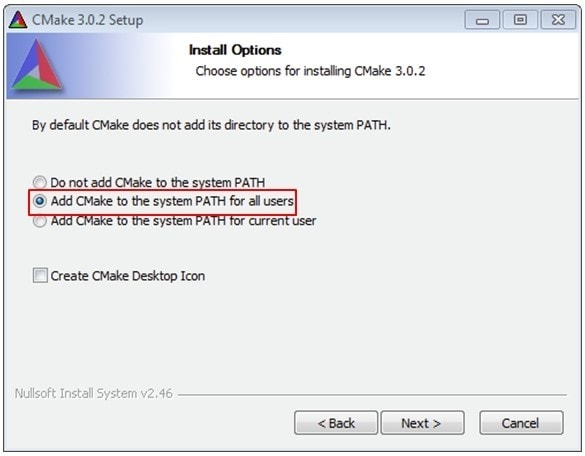
安装CMake,确保安装时选择"Add CMake to system PATH"选项。由用户选择是为所有用户还是只为当前用户将其安装到PATH。In this example, the assumption is that it's installed for all users
-
按照安装程序的其余指令操作
-
可能需要重启系统,才能使PATH更改生效
注:此安装路径不包含任何空格。
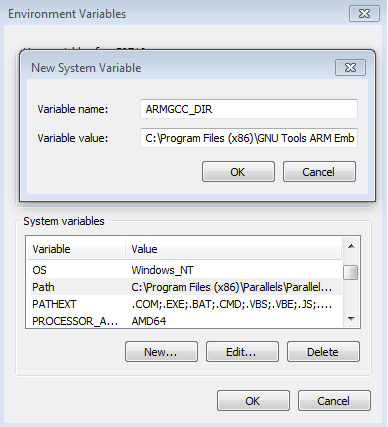
为ARMGCC_DIR添加新环境变量。
创建新的系统环境变量并命名为ARMGCC_DIR。此变量的值应当指向Arm GCC嵌入式工具链安装路径,此例中的安装路径为:
C:\Program Files (x86)\GNU Tools Arm Embedded\4.9 2015q3
参考GNU Arm GCC嵌入式工具的安装文件夹,获得确切的安装路径名。
安装CMake
构建示例应用
要构建示例应用,请按照这些步骤操作。
- 如果没有运行,则打开GCC Arm嵌入式工具链命令窗口。To launch the window, from the Windows operating system Start menu, go to “Programs → GNU Tools Arm Embedded
” and select “GCC Command Prompt” 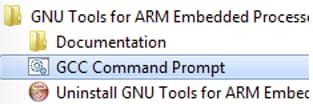
-
将目录更改为示例应用项目目录,它有如下路径:
/boards/ / / /armgcc 对于本指南,确切的路径为:
/boards/frdmk64f/demo_apps/hello_world/armgcc - 在命令行输入“
build_debug.bat”,或双击Windows操作系统Explorer中的"build_debug.bat"文件,执行构建。The output is shown in this figure: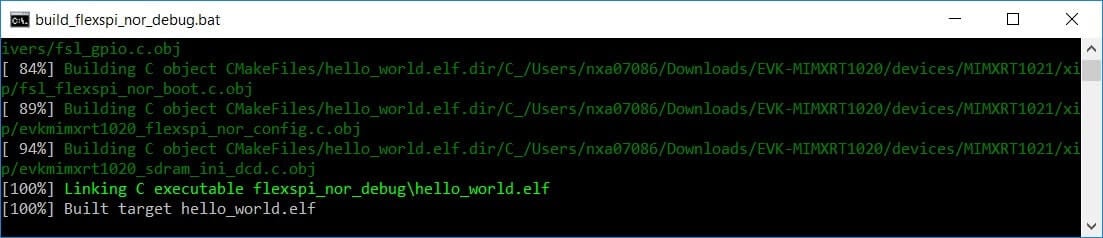
运行示例应用
GCC工具需要J-Link调试接口。要将板上的OpenSDA固件更新为最新的J-Link应用,请访问OpenSDA。After installing the J-Link OpenSDA application, download the J-Link driver and software package from Segger
- Connect the development platform to your PC via USB cable between the "SDAUSB" USB port on the board and the PC USB connector
- 打开PC上的终端应用(如PuTTY或TeraTerm),并连接到您之前确定的调试COM端口。采用以下设置配置终端:
- 波特率为15,200
- 无奇偶校验位
- Eight data bits
- 停止位为1
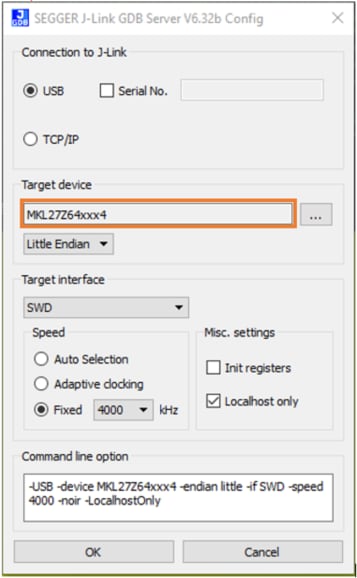
- 打开J-Link GDB Server应用。Assuming the J-Link software is installed, the application can be launched by going to the Windows operating system Start menu and selecting "Programs → SEGGER → J-Link
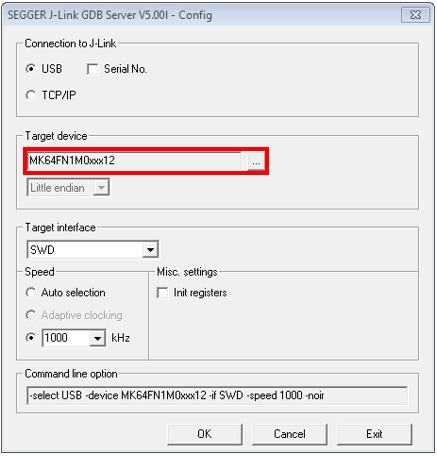
J-Link GDB Server" - 修改设置,如下所示。The target device selection chosen for this example is the “MK64FN1M0xxx12” and use the SWD interface
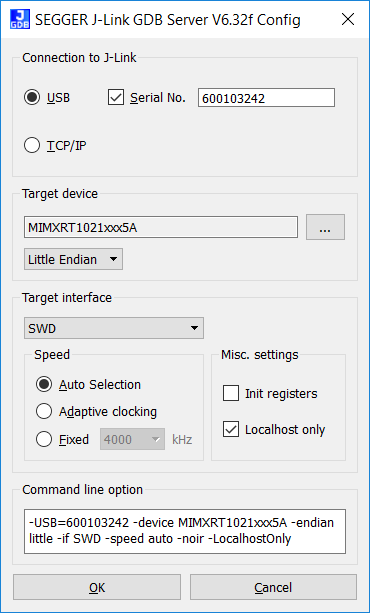
- 设备连接后,屏幕显示如图:
- 如果没有运行,则打开GCC Arm嵌入式工具链命令窗口。To launch the window, from the Windows operating system Start menu, go to "Programs → GNU Tools Arm Embedded
" and select "GCC Command Prompt" 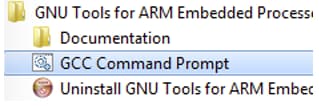
-
更改为包含演示应用输出的目录。根据所选的构建目标,使用以下两个路径中的一个可以找到此输出:
/boards/ / / /armgcc/debug /boards/ / / /armgcc/release 对于本指南,路径为:
/boards/frdmk64f/demo_apps/hello_world/armgcc/debug - 运行命令"
arm-none-eabi-gdb.exe"。For this example, it is ".elf arm-none-eabi-gdb.exe hello_world.elf"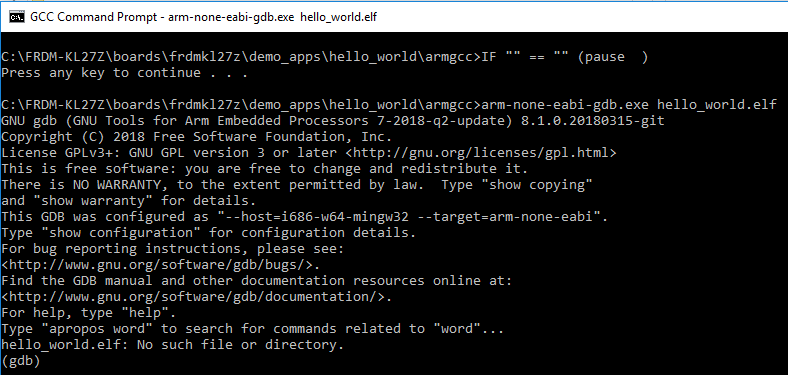
-
运行以下命令:
- "target remote localhost: 2331"
- "monitor reset"
- "monitor halt"
- "load"
- "monitor reset"
-
此应用已下载成功并停留在复位矢量。Execute the "monitor go" command to start the example application
The
hello_worldapplication is now running and a banner is displayed in the terminal window